Portal Images
Overview
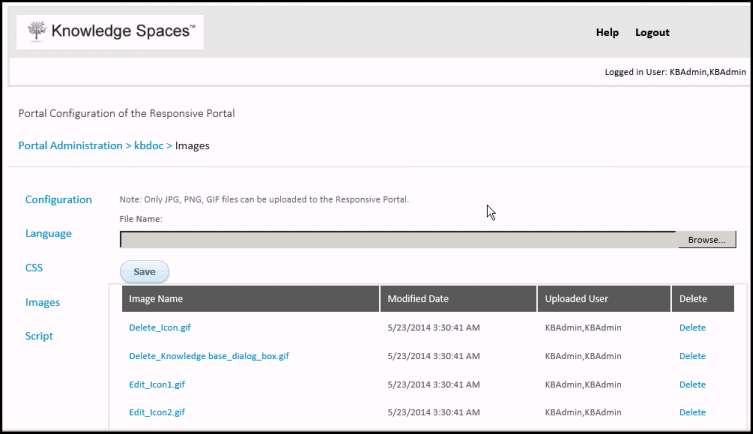
The Images option allows you to upload graphic-files to a portal. You can also delete and download files from this page. Permitted image file formats are JPG, PNG, and GIF.
Prerequisites
Save the graphic files in any of the 3 permitted formats in an appropriately named folder in any of the accessible drives of your computer. In case of widgets that allow users to configure multiple instances, for example: categories or solution finders, each instance can be set with a matching graphic. As a best practice, all such files must have images of the same dimension and resolution to ensure a neat on-screen display.
Upload an image file
- Login to Portal Administration.
- Click Edit in the selected portal's row in the Available Portalslist.
- Click Configuration.
- Click Images.
- Click Browse & Navigate to the folder containing the graphic files & Mark one or more files.
- Click Open. The selection appears in the browse bar.
- Click Save.
Files uploaded to a portal are listed in the table on this page.

Note: The maximum file size that can be uploaded is 3MB.
To reference images in the portal's configuration, CSS, or JavaScript include the following path:
\images\ Client ID \ Portal ID \ File Name.
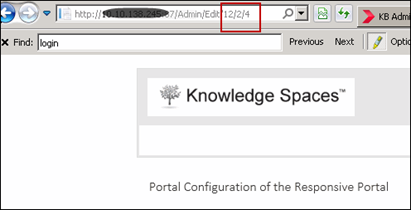
You can determine the Client ID and Portal ID from the portal's URL. In the example below "12" is the client ID and "2" is the portal ID.

Figure : Portal URL Client and Portal IDs.
Important Notes:
- If you are configuring the home page category and attribute widgets, specify only the image file name in the configuration file. Do not include the full path.
- To improve the portal's performance, images may be cached for up-to 1 hour.
